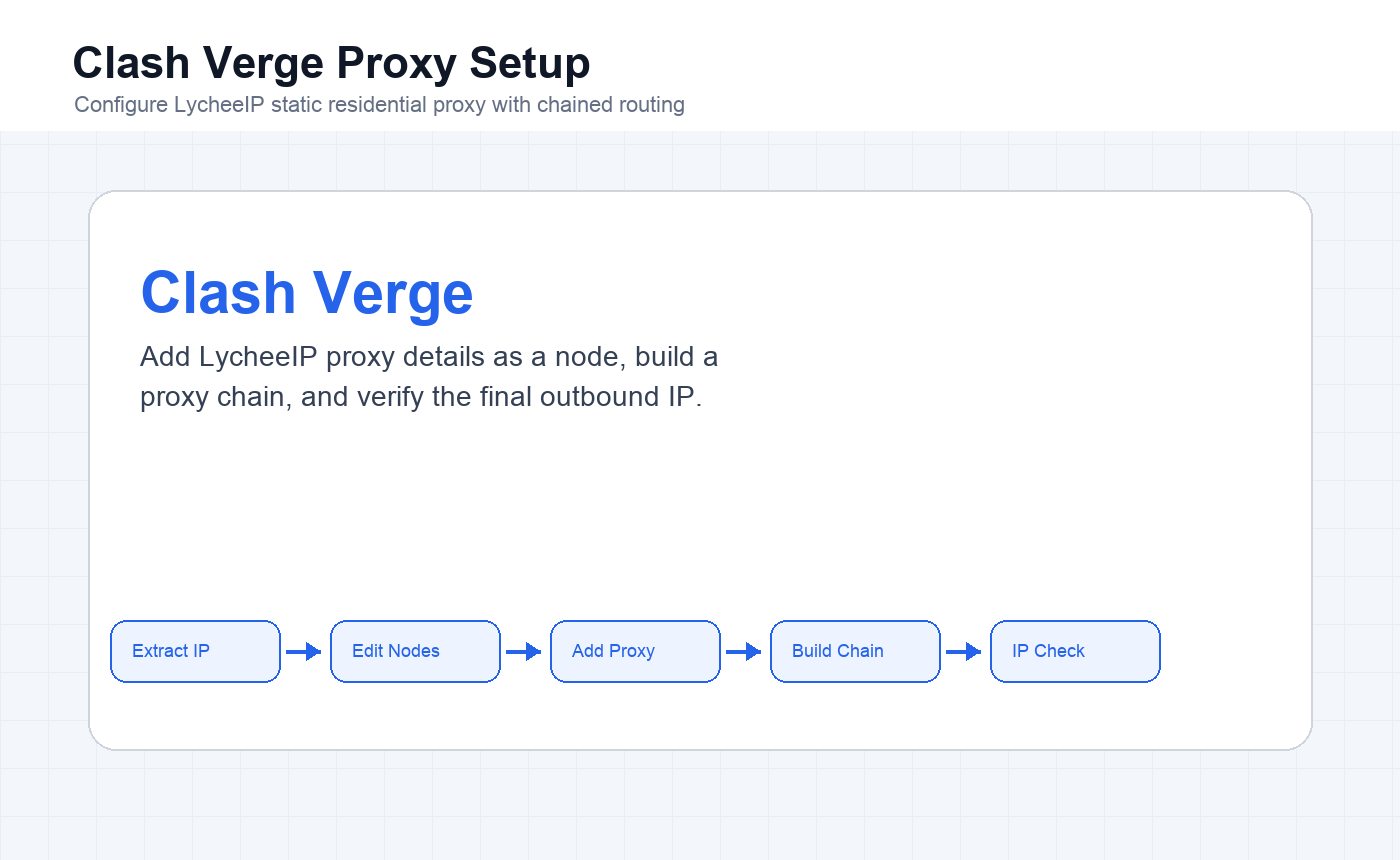
Configure LycheeIP static residential proxy IPs in Clash Verge by extracting the proxy details, adding the proxy as an HTTP or SOCKS5 node, building a chained proxy route, and verifying the final outbound IP in a browser.
LycheeIP proxy products need to be used from an overseas network environment. This Clash Verge workflow assumes you already have a working direct line prepared by the user, and the LycheeIP proxy is added as the final exit IP.
Step 1: Extract the LycheeIP Proxy IP
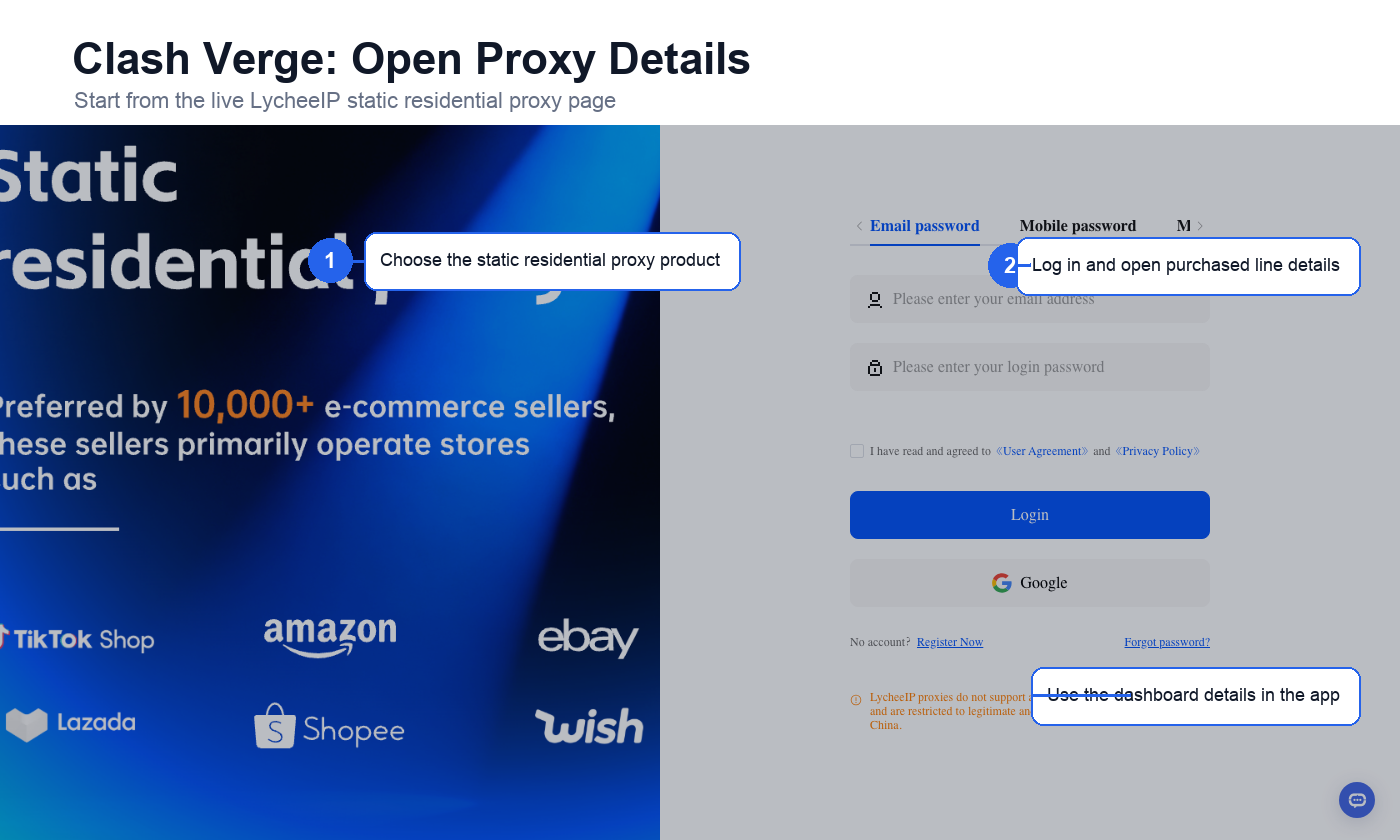
Log in to the LycheeIP dashboard, purchase a residential proxy, then open the purchased line details from the account menu. Copy the proxy host, port, username, password, and protocol.
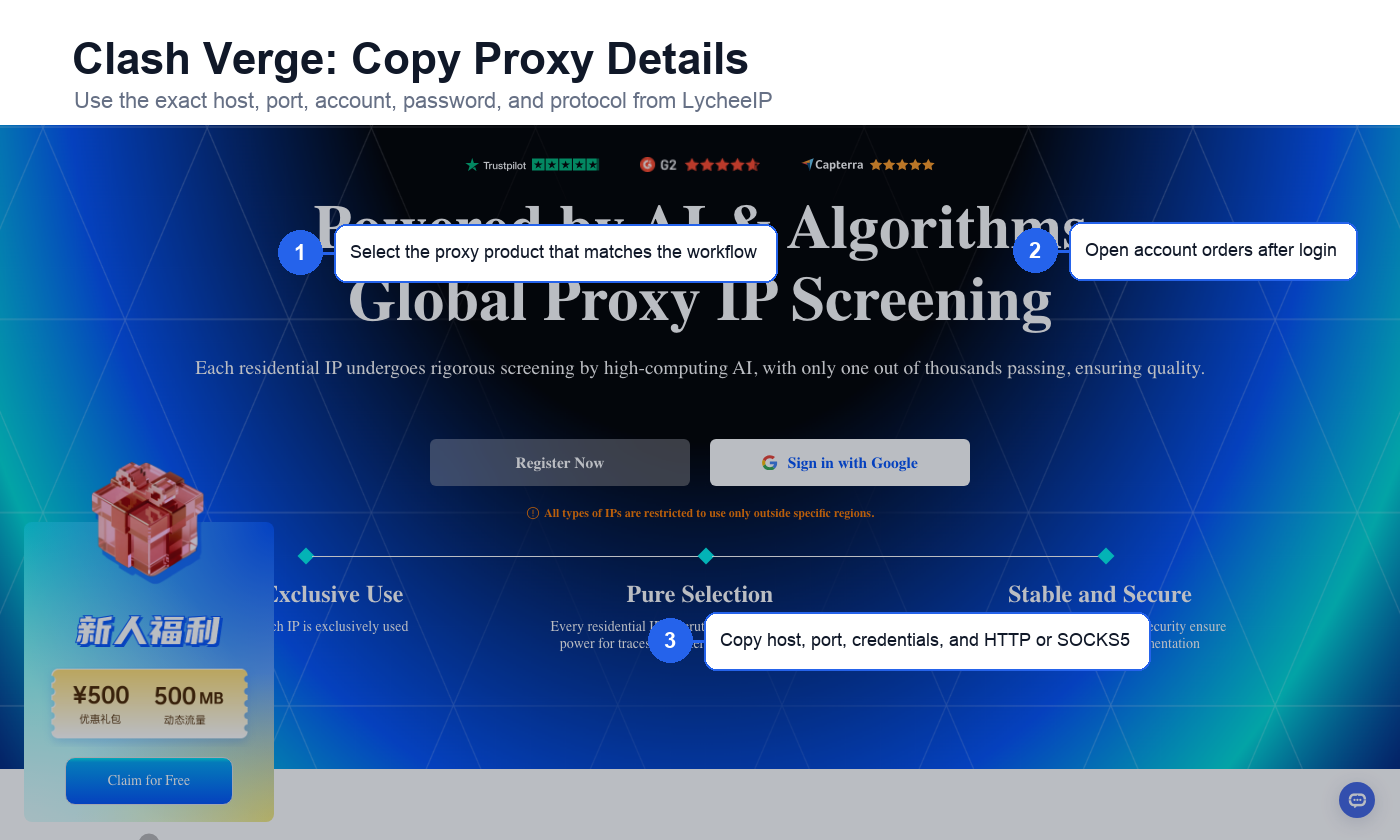
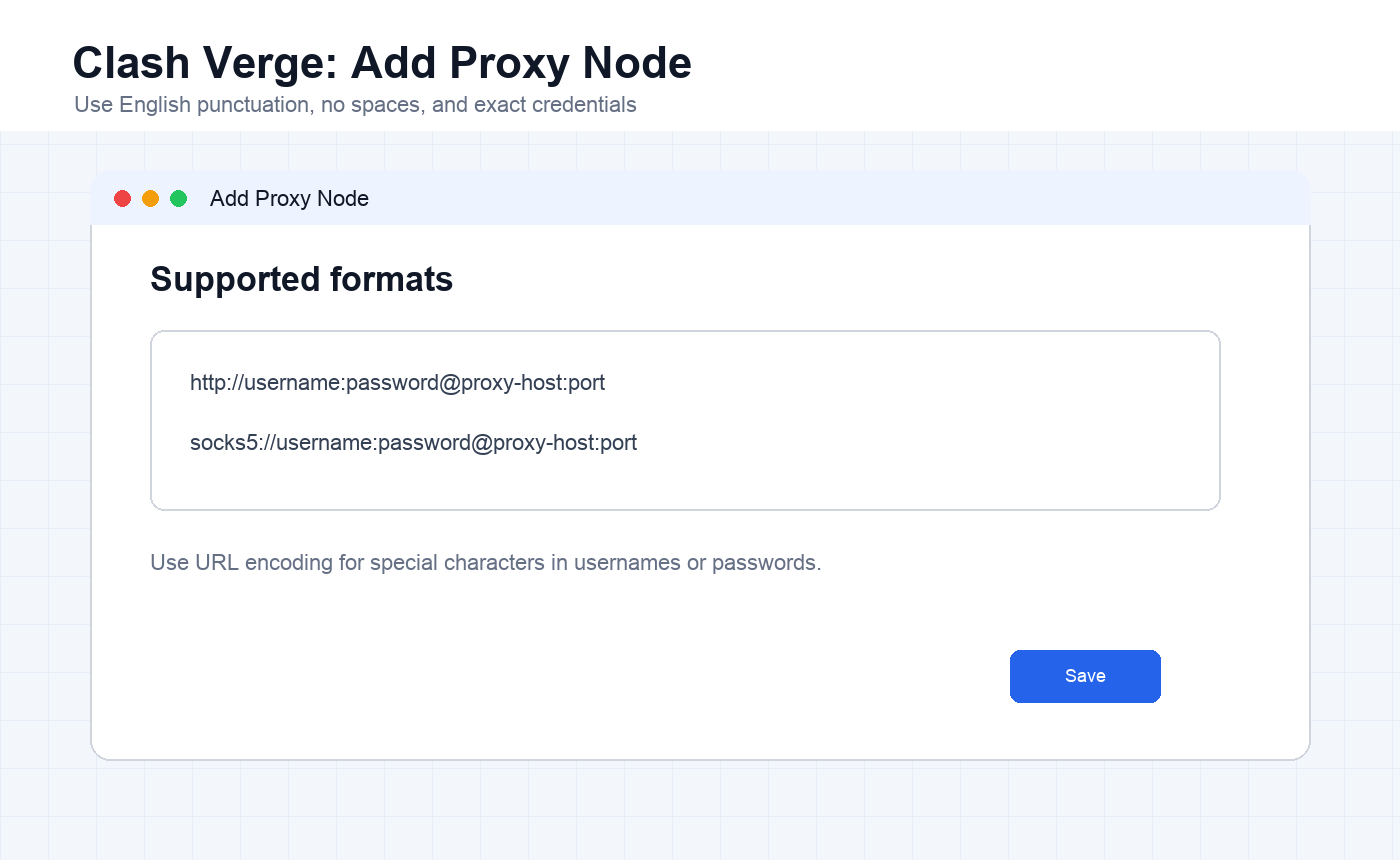
For Clash Verge, the proxy node format must be exact. Use English punctuation, avoid spaces, and URL-encode special characters in usernames or passwords when necessary.
View LycheeIP Static Residential Proxies
Step 2: Add the Proxy Node in Clash Verge
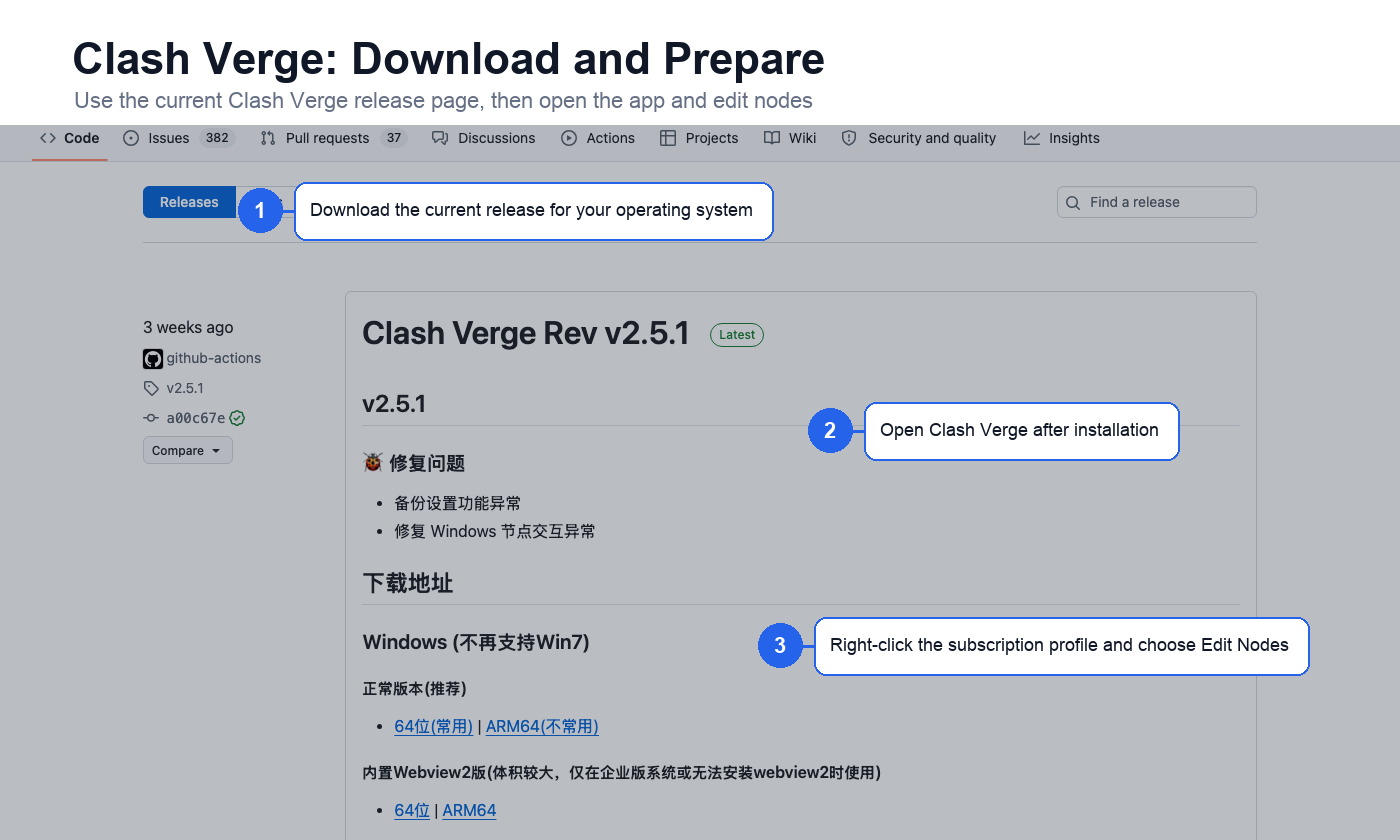
Download Clash Verge and Prepare a Direct Line
Download Clash Verge and make sure it already contains a usable direct overseas line prepared by the user. This first-layer line is separate from the LycheeIP proxy you purchased.
Edit Nodes
Right-click the subscription profile and choose Edit Nodes. This is where you add the LycheeIP proxy node in a format Clash Verge can parse.
Add HTTP or SOCKS5 Proxy Format
Add the proxy node using one of the target formats below: http://username:password@IP-address:port or socks5://username:password@IP-address:port. Keep all punctuation in English and do not include spaces.
Step 3: Configure the Proxy Chain
Open Chained Proxy and click the route names in order. The entry node should be the user-prepared direct line, optional middle nodes can be added if needed, and the LycheeIP proxy should be the exit node at the bottom.
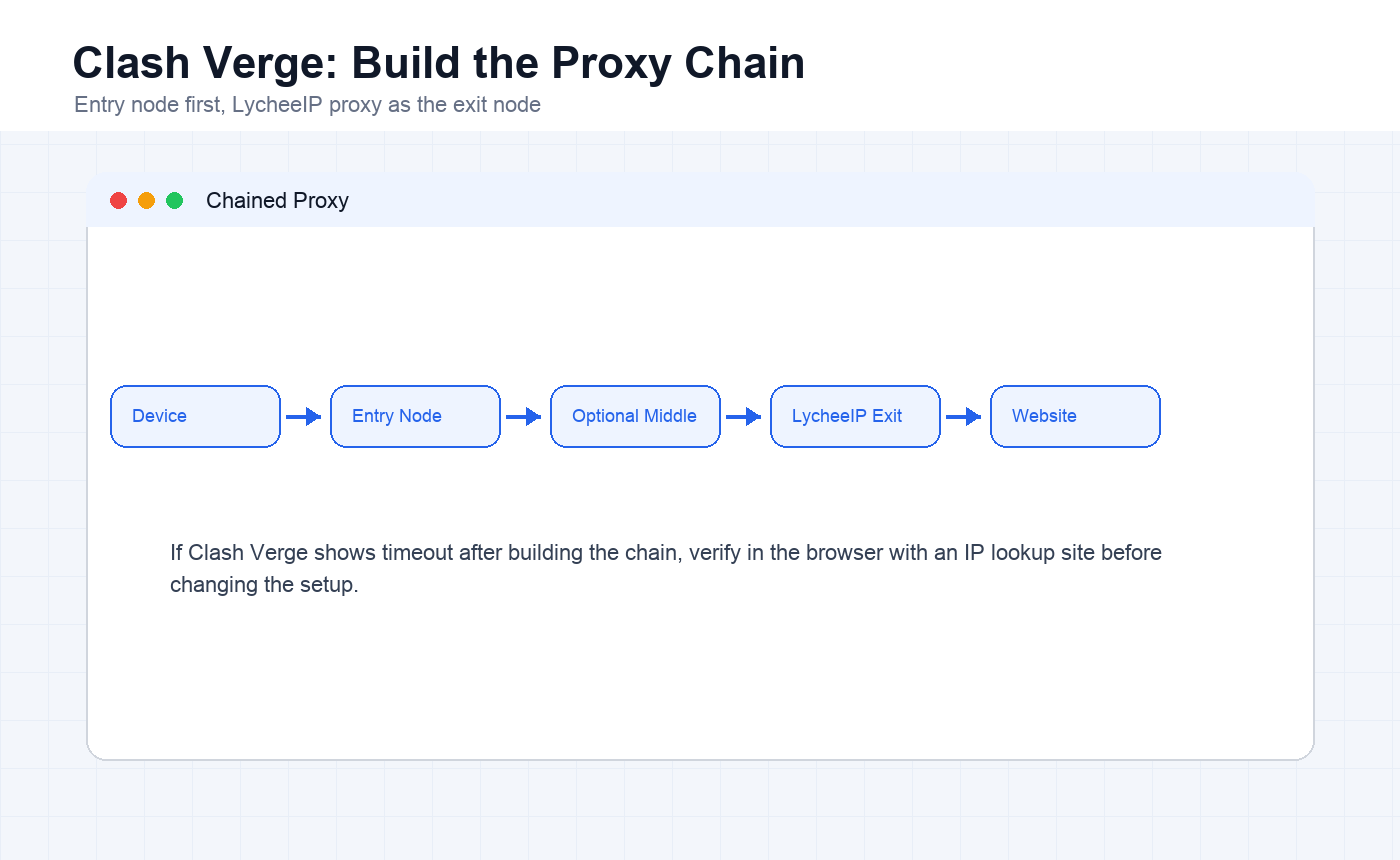
- Entry node: the first node traffic reaches, usually your prepared direct line.
- Middle node: optional relay node if your workflow needs one.
- Exit node: the final outbound IP, which should be the LycheeIP proxy IP.
- Traffic path: user device to entry node, optional middle node, LycheeIP exit node, then target website.
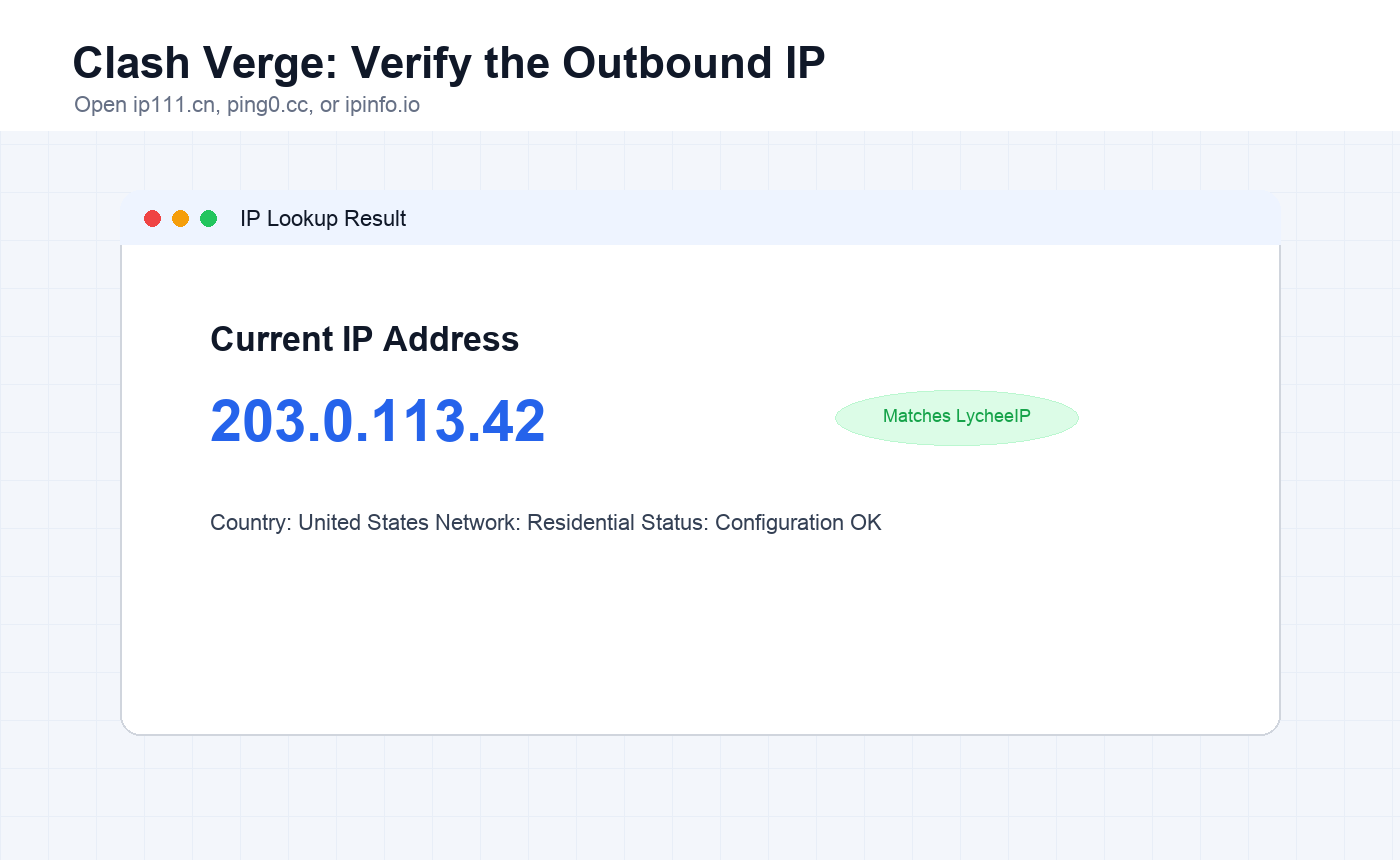
Step 4: Verify the Current IP
After configuring the chain, Clash Verge may show timeout in some situations. Do not judge the setup from that label alone. Open a browser and visit ip111.cn, ping0.cc, or ipinfo.io. If the displayed IP is the purchased LycheeIP IP and Google or other target sites open normally, the setup is working.
Important Notes for Clash Verge Proxy Chains
- Latency increases because every node in the chain adds delay.
- Final speed depends on the slowest node in the chain.
- If any node fails, the full proxy chain may fail.
- Keep the direct line above the LycheeIP exit IP in the chain order.
- When using username and password authentication, encode special characters and avoid spaces.
Frequently Asked Questions
Why do I need a direct line before adding LycheeIP?
The source workflow uses chained routing. The user-prepared direct line acts as the first layer, and the LycheeIP residential proxy becomes the final outbound IP.
Which format should I use for the node?
Use the protocol from your LycheeIP order. For HTTP use http://username:password@host:port. For SOCKS5 use socks5://username:password@host:port.
What if Clash Verge shows timeout?
Verify in the browser with an IP lookup website. If the browser shows the purchased IP and can open target websites, the route is working despite the timeout label.
Can I change the node order later?
Yes, but keep the route logic clear. The direct line should be the entry layer and LycheeIP should be the exit IP when account continuity matters.
Related LycheeIP Articles
Related LycheeIP resources: residential proxies, anonymous proxy servers, mobile proxies, Apple proxy setup, V2rayN PC setup, MoreLogin proxy setup, Instagram proxy management, mobile and residential proxy use cases, private proxy guide, public versus private IP guide.